
How to do the “Birch” correctly, how long do you need to stand and what does the exercise give? Birch exercise: the benefits and harms of this exercise
Hello to all fans of a healthy lifestyle! Many of you have probably heard at least once about the comprehensive benefits of special exercises, poses or asanas of Indian yoga. There is especially much discussion about the benefits of their use in everyday gymnastics for girls and women, boys and men.
It is to these healing poses and exercises that I will devote several upcoming reviews of my sports cycle. And today on the agenda is the birch tree exercise. I will try to tell you in as much detail as possible about what it is, what the benefits of daily practice are and how to do it correctly, about the effect on various organs and systems.
Birch or Candlestick is an inverted pose called a "full body pose." Essentially, this is a stand with emphasis on the shoulders, neck, head and elbows with the feet up. It was borrowed from traditional yoga, and within this ancient Indian teaching is called Salamba Sarvangasana (shoulder stance).
The beneficial effect on the body in this case is based on the reverse processes that occur when changing the position of the body.
In ancient India, there was a belief according to which a person, standing on his feet, grows old, and while staying in Viparita Karani, he becomes younger.
What muscles work?
This asana is rightfully considered one of the most functional. It involves a large number of muscle groups, starting with the muscles of the cervical-collar region and the shoulder girdle.
To hold the legs at the top point, the oblique muscles of the abdomen and back, rhomboid dorsal, latissimus and quadratus muscles, erector spinae, and abs are actively involved. The pelvic floor muscles also work, along with the internal and external thigh muscles.
Benefits and harm to the body
Sarvangasana and its variations have a lot of beneficial properties, from the effect on the muscles to the positive effect on the skin. Thus, by improving the outflow and subsequent flow of blood to the pelvic organs, their function improves and congestion is relieved (prevention of diseases of the genitourinary system). This effect is especially pronounced in people leading a sedentary lifestyle.
In this position, when performed correctly, muscle spasms in the cervical region, vascular spasms in the brain go away, and migraines and prolonged, aching headaches recede over time.
I will not tire of repeating that harm from any physical exercise, including Sarvangasana, can only be caused to oneself if the technique is not followed or if contraindications are ignored, which I will discuss below.
Contraindications
Since this is an inverted asana, it is contraindicated in cases of severe hypertension. If we are talking about its mild forms, then you can practice it with extreme caution and in consultation with your doctor. Other restrictions and contraindications to performing the pose include:
- Heart diseases.
- Atherosclerosis.
- Previous spinal injuries and severe spinal and neck pain.
- Hyperfunction of the thyroid gland (hyperthyroidism).
- The period of menstruation and pregnancy (especially the first trimester).
- Epilepsy.
- Otitis and sinusitis in the acute stage.
- Retinal diseases and glaucoma.
Correct technique and types
I will give several options for the correct technique of the classic and lightweight versions of the “birch tree”.
Classic "birch"
To begin with, it doesn’t hurt to prepare a place for training. Place a blanket folded in four on the floor. Lie down so that your head is on the floor and your shoulder blades are at the very edge of the mat.
- Lie on your back and make sure your feet touch each other. Strain your knees and stretch your arms along your body. Palms face down, neck and head are in line with the spine.
- As you exhale, raise both legs together, bringing them to a right angle with the body. Toes point up. Let's breathe calmly.
- As you exhale, raise your legs higher by lifting your hips and back from the surface. Support your lower back with your palms.
- Now we pull our legs even higher and bring them in line with the buttocks. Pull your back, buttocks and waist inward so that your torso is perpendicular to the ground.
- While breathing normally, we hold this position for some time.
- We exhale, release our arms, and gradually slide down until our back rests on the floor and our legs take a position perpendicular to the floor. We lower them to the floor.
Wall supported
- Place the blanket 60 centimeters from the wall. We lie on our backs, making sure that our shoulders are positioned on the mat 3 cm from its edge, and our heads are on the floor.
- Bend your knees and stretch your arms out at your sides, palms up.

- We press the back of our head to the floor, and our arms and shoulders to the blanket. As you exhale, move your legs behind your head and touch the wall with your toes. Bend your elbows and place your palms under your lower back (fingers pointing up).
Option with a chair
In addition to the chair, we will need a bolster. We place it on the ground, parallel to the front legs of the chair. chest to the back, clasping it with your arms. Alternately, we throw our legs over the back and slowly lower our arms, moving ourselves closer to it with our buttocks.

- We lower our backs to the level of the seat and rest our elbows on it. Hold on to the back and move your buttocks closer to the front edge of the seat. We lower our shoulders onto the bolster, carefully sliding out of the seat. Place the head on the surface. We grab the back legs with our hands and straighten our legs.
- We hold this position for some time. We take our hands to the side edges of the chair (closer to its back). Bend your knees and place your feet on the upper part of the backrest. The buttocks lie on the front edge of the seat.
- Supporting the body with your hands, straighten your legs one by one. Raise the chest as high as possible. We stay in this position for some time.
- As you exhale, lower your feet onto the back and slowly slide out of the seat.
When performing, you should control the position of your elbows - they should not be wider than your shoulders. As you lift your lower body upward, make sure your upper chest touches your chin. In this case, the larynx should not be compressed. The appearance of a cough at this moment or when lowering the body indicates a constricted throat.
What time of day should you do the exercise?
How long do you need to stand?
It all depends on personal feelings. At first, you simply won’t be able to maintain such a specific position for long. It is better to start with one minute, gradually increasing the time to 5 minutes.
Sets and reps
What can replace the exercise?
There are several analogues of this pose:
- Karnapidasana (ears to knees pose).
- Halasana ("Plow").
- Naialamba-Sarvangasana (standing on shoulders without support).
Common mistakes
For beginners, at first it is a problem to keep their legs upright - they often lean forward and create additional pressure on the chest. In this case, it is better to simplify the task by doing everything with your feet resting against the wall or with a chair.
Due to the inverted position of the body, there is a powerful flow of blood to the brain, it is saturated with oxygen.
- The thyroid gland is stimulated, which normalizes the activity of hormones and strengthens the immune system.
- Pressure in the pelvic area is normalized, which alleviates suffering from hemorrhoids.
- The pose helps to concentrate, relieve fatigue, and find harmony of soul and body.
There is also an opinion that Sarvangasana is especially useful for women dreaming of a child. Allegedly, the birch tree position adopted immediately after intercourse promotes conception. However, this fact has not been verified.
How to perform Sarvangasana
Before performing Sarvagasana, it is necessary to prepare the muscles and warm them up. To do this, you can do several exercises before performing. If the asana is performed in combination with other yoga poses, it must be done at the end of the session.
Those who have been performing this exercise recently should take care to reduce discomfort in the neck area. It is better to perform the asana on a special yoga mat or on a thick blanket to reduce possible pain.
Technique for performing the pose
The full name of this position is "salamba sarvangasana 1"
1. Lie on your back.
2. Bend your knees and pull them towards your chest.
3. Raise your pelvis, supporting your body from behind with your arms bent at the elbows. The knees may touch the forehead.
4. Slowly, without jerking, straighten your legs.
5. Make sure that your legs are perpendicular to the floor; to do this, try to move your pelvis forward. Hands help hold the body in the correct position. The main load should fall on the shoulders, and not on the cervical spine.
6. You can remain in this position until you feel discomfort. Ideally, you can take up to 10 inhalations and exhalations and begin to exit.
7. To exit the asana, you first need to bend your legs, then lower your pelvis, and then straighten your legs to a lying position.
The asana is performed at a slow pace, breathing evenly.
There are also more complex options for performing sarvangasana:
Salamba sarvangasana 2 – hands are removed from the back and extended parallel to the floor (fingers can be intertwined);
- niralamba sarvangasana 1 – straight arms are moved to a position behind the head;
- niralamba sarvangasana 2 – hands are located along the legs.
If you wish, you can master these variants of asana. It is better to do this in the order in which they are listed, sequentially moving from the easiest pose to the most difficult one.
This asana should not be practiced by people with high blood pressure or those who have suffered injuries to the cervical spine.
When we hear the phrase “birch exercise,” the first thing that comes to mind is school lessons. It turns out that this stance is very useful for, but only if performed correctly.
How to make a birch tree correctly, why the exercise is useful - we will look at it in this article.
Description
“Sarvangasana” in, “candle” in European, “birch” among the Slavs - is one of the basic ones in acrobatics and. Everyone can do it, but not everyone knows what effect is possible from regular exercise. 
The “birch tree” pose is a stand on, with straight arms extended upward, while the arms support the body in the pelvic area or. Subsequently, after regular exercise, the arms can be stretched on the floor, holding the body in an upright position with force.
During this position, blood circulation improves, better blood flows to the back of the head through the vertebral artery, thereby improving the functioning of the internal organs. From Sanskrit, "sarvangasana" is translated as "pose for the whole body." For those who have just begun to practice it, it will be easier to start with the easier version of “viparita karani”. This is the same stance, but in it you can bend at the lower back, literally laying it on the supporting bodies. 
Did you know? According to yogi philosophy, the soma chakra, which is located in the upper part of the forehead, is considered the concentration of lunar nectar. Nectar is a source and... In the normal position of the body, it moves to the solar plexus and there it burns in the fiery “manipura” chakra, which leads to aging. Thanks to sarvangasana, the nectar remains in place and the body does not age.
Benefits of exercise
The birch tree stance benefits almost the entire body:
- strengthens the muscles of the back, hips and legs;
- salt deposition is reduced;
- strengthens;
- aligned ;
- the amount of subcutaneous fat deposits decreases.
 This exercise allows you to relieve stress from your legs, abdominal cavity, and loosen your spine. This helps treat many health problems, both in and out of:
 - digestion also improves;
- blood vessels are strengthened;
- activity is normalized;
- the endocrine and hormonal systems return to normal;
- work improves;
- migraine pain goes away;
- comes back to normal.
Did you know? Static exercises such as birch-This is the basis in artistic gymnastics. It is this ability of an athlete to hold a tense body in one position, while demonstrating balance, that is highly valued in competitions.
How to make a birch tree correctly
It is recommended to start after warming up: do light gymnastic exercises to keep your body pliable and to avoid cramps, sprains or pinching. 
The shoulder blade stand has a simple technique:
- lie on your back on a mat laid out on the floor;
- put your legs together and lift them up, then lift your hips off the floor;
- help yourself with your hands, resting them on your lower back.
 As a result, the head and shoulder blades lie on the floor, and the body and legs are positioned vertically, while trying to keep the body level. You should “come out” of the stance smoothly, lie down for a while, relaxing your muscles. The best time to practice is while the body and brain are relaxed and the stomach is empty. It is advisable to take food after exercise an hour later; it should be something light. The exercise can be done every day.
 Possible difficulties and errors
If you have difficulty performing it, you can make the exercise easier. Place a chair behind your head, first cross your legs over, place your toes on the seat of the chair, and then smoothly level up. Do not immediately rush to stand in this position for a long time, start with thirty seconds, gradually increasing to three minutes.
Important! It is advisable to increase the time when the body is already accustomed to this position and you do not experience any difficulties in performing or any discomfort in the stance.
 A correctly performed birch exercise is beneficial, but errors in execution can be harmful to your health. You can cause harm to yourself by starting a stand without warming up properly, as well as during the stand itself. There are several rules:
 - during the exercise you need to relax;
- you should not stand in a pose experiencing a feeling of discomfort; if this happens, it means you are doing something wrong or have increased the time too much;
- You can’t twist your head or neck while standing, you can inflict it on yourself;
- You should not perform the exercise if you used before;
- If you have health problems, you should not stand for more than a minute.
Important! Viparita-karani is less traumatic and easier to perform; perhaps it is better for beginners to first master it and then stretch into the “birch tree”.
The birch tree exercise undoubtedly benefits the body, but in some cases there are contraindications to its implementation.
You cannot perform a stand in the following cases:
- with inguinal;
- during critical days;
- in case of injury to the spine and cervical spine;
- enlarged thyroid gland;
- for problems with cardiac activity;
- for glaucoma;
- with otitis;
- if the pressure is too high;
- for pregnant women in later stages.
 Doctors explain these results by improved blood circulation, which improves the functioning of all body systems. Yogis add that not only the physical body is rejuvenated, but also our spiritual beginning.
 From the words “alamba” - support, support and “sa” - together, accompanied. "Salamba", thus, is supported, leaning. "Sarvanga" - the whole body, all limbs ("sarva" - whole, whole, completely, "anga" - limb, body). In this pose, the whole body benefits from the exercise, hence the name.
Brief description of the technique Sarvangasana
Two techniques are described below: A and B.
Technique A
1. Place a blanket folded in four on the floor. Lie flat on your back with your legs and feet touching each other. Tighten your knees and extend your arms close to your body. Keep your shoulders pointed down and away from your head. Palms point down. The head and neck should be in line with the spine. Stay in this position for a while, breathing normally.
2. Exhale and bend your knees so that they are above your chest. Stay in this position for 5 seconds.
3. Place your palms on the floor and lift your waist and hips, keeping your knees bent and allowing them to go behind your head. Support the upper back of your thighs with your palms and lift your torso. Inhale and exhale.
4. Raise your hips further and support your back with your hands. The body from shoulders to knees is now perpendicular to the floor. The top of the sternum touches the chin. Keep your palms on your back, where your kidneys are, with your thumbs toward the front of your body and your fingers toward your spine.
5. Contract your glutes so that your lower back and tailbone remain pulled in, and straighten your legs toward the ceiling.
6. Remain in this final position for 5 minutes, breathing normally. Gradually increase the duration. At the initial stages of training, 2-3 minutes are enough. Wherein:
(1) press your palms and fingers into your back to straighten your entire body from armpits to toes;
(2) do not let your elbows spread out to the sides, keep them as close to each other as possible, pointing inward;
(3) point your shoulders back and away from the direction of your head; move the tops of your arms towards each other.
7. Exhale, bend your knees and gradually lower your buttocks and back down with a sliding movement, without jerking your spine. When you are in position 3, remove your palms from your back, lower your buttocks down to the floor and straighten your legs.
Special Notes:
 (1) Those who cannot do this asana on their own should ask someone for help when starting the practice. Assume position 2, then have a helper grab your ankles and push your legs toward your head; at the same time you should raise your hips and back and enter the final position of the asana. Keep your body upright and firm while your assistant uses their knees to support your back and buttocks.
(2) If no one is helping you, then use a chair or stool for this purpose. Release your arms from your back, one by one, and grasp a chair or stool, maintaining your balance.
(4) If this is not possible, then first learn to do Halasana. While in Halasana, extend your legs up, one after the other, and enter Salamba Sarvangasan.
After you master Technique A, learn Technique B.
Technique B
 1. Lie flat on the floor.
2. Straighten your knees and lift both legs together so that they are at right angles to your body. The toes point up. Breathe normally.
3. Exhale and lift your legs higher, towards your head, by lifting your hips and back off the floor. Support your back with your palms.
4. Keep your torso at right angles to the floor and extend your legs even further towards the ceiling.
5. Exhale, bring your legs to a position so that they are in line with your buttocks. Pull your back, waist, and buttocks inward so that your body is perpendicular to the floor. 
6. Breathing normally, remain in this final position for about 5 minutes. Wherein:
(1) stretch your back up;
(2) expand your chest;
(3) tighten your glutes;
(4) do not bend your knees or turn your hips out;
(5) keep your feet together.
7. Exhale, release your arms and gradually slide down until your back is on the floor and your legs are perpendicular to the floor. Lower your legs, keeping them straight.
Special Notes:
 (1) Elbows should not be wider than shoulders. Increasing the distance will cause the chest to sag.
(2) When lifting the body upward, the upper part of the sternum should touch the chin, as in Jalandhara Bandha, but there should not be a feeling of suffocation or constriction in the larynx; if you cough at this moment or when you lower your body, this is a sure sign of pressure on the throat. Don't try to touch your chin to your sternum. Rather, the action should be the opposite: lift the chest so that the sternum touches the chin, otherwise there will be no benefit. Sarvangasana gets lost.
(3) If the chest is not raised properly, breathing will be difficult. Do not turn your neck to the sides to make breathing easier, but expand your chest and lift your torso.
(4) Some will experience difficulty breathing because their chest is heavy or their chest is not raised properly. They should increase the height of the blanket by folding it again or adding another rolled blanket 5-7 cm thick, placing it on top of the first. The fold of the top blanket should extend a few centimeters from the edge of the bottom one,  creating space for the head to rest on the lower fold, thus allowing the shoulders and lower neck area to rest on the upper fold. Now do Sarvangasan. This additional blanket increases the height by 5-7 cm and allows you to breathe freely, eliminating pressure on the thyroid gland. This method makes it easy to do Sarvangasan.
(5) Those with heavy buttocks will find their legs tilting forward, creating an angle and creating a heaviness in the chest. They should resort to the help of a rope, bench or assistant.
Sarvangasana cannot be performed if:
- high blood pressure;
- arteriosclerosis;
- in case of damage to the cervical vertebrae or displacement of the intervertebral disc;
- pain in the cervical spine and shoulder girdle;
- otitis;
- sinusitis;
- ophthalmia;
- migraines or severe headaches;
- menses;
- pregnancy;
- upset stomach;
- diseases of the thyroid gland (goiter), heart, liver and spleen.
Subtleties of performing Sarvangasana:
Advice for beginners and adults:
At the learning stage Sarvangasan It is better to practice on the foot of 2-4 flannel blankets folded four times, resting your shoulders on its edge. The neck hangs down and is relaxed. The back of the head rests on the floor. The elbows and shoulder girdle rest on the pile of blankets. This device allows you to relieve the load from the cervical spine, creating a comfortable state for the practitioner. This recommendation can be given to everyone over 40 years of age and to those who have minor problems with the cervical spine. (all-yoga.ru)
Detailed description of the technology Sarvangasana
Salamba Sarvangasana (Shoulder Stand with Support) is one of the canonical asanas, which has a powerful therapeutic effect. It will help get rid of allergies and bronchial asthma, improve the functioning of the thyroid gland, strengthen the nervous system - you can’t count it all. Body alignment in Shoulderstand- a rather complex matter, and there are many nuances here. You need to build a pose from the bottom up: if you do not pay due attention to the position of your neck and shoulders, you risk damaging your cervical spine or losing your balance.
Sarvangasana– a real salvation from fatigue, overexcitation or bad mood at the end of a hard day. After a few minutes in the pose, you will feel your peace of mind returning.
You must become a pedant in preparation for execution Sarvangasana, because incorrect body position can lead to compression of the fragile cervical spine. But the risk involved in doing Shoulder Stands, is not a reason to abandon it altogether.
Sarvangasana and the Spine
 The cervical spine consists of seven vertebrae. All of them, except the first two, are separated from each other by movable discs, which create space for the spinal nerves that begin in the spinal cord and exit between the vertebrae. The discs also allow the neck to bend and rotate. Normally, the vertebrae and discs are positioned in such a way that they form the curve of the neck at the back of it. It allows you to optimally distribute the pressure of the head on the neck. The curve is supported by the nuchal ligament, located along the back of the neck. This ligament is attached to the bony (spinous) processes protruding from the back of the vertebrae. The nuchal ligament is quite elastic, so it contracts to its normal state after traction. Thus, if you flex your neck, tilting your head forward, and then return it to a neutral position, the ligament allows you to restore the cervical curve.
The degree of cervical bend in Shoulderstand depends on how you perform the pose. If you don't use support, but shift your body weight back so that the pressure is on the backs of your shoulders and your upper spine and ribcage are tilted diagonally away from your head, you won't put much pressure on your neck. This is a standard and completely safe way to perform Sarvangasana for some schools of yoga. But if you, placing your head and shoulders in the same plane, try to stretch the spine and chest strictly vertically, pushing the sternum towards the chin, the cervical bend under the pressure of the weight of the whole body becomes too strong. Few people are able to perform the pose in this way without causing harm to themselves, while most people simply cannot bend their neck so much without the risk of getting a hidden or obvious injury.
Iyengar says that a vertical Shoulder Stand is stronger and more effective than a non-vertical one. More and more people are trying to imitate the inherent evenness of posture in Iyengar's style, but are not using the aids he recommends. As a result, they inevitably exceed the limited mobility of the neck. This is not to say that an absolutely vertical Shoulder Stand without additional support is a “bad” pose. On the contrary, perhaps this is the ideal option, but it is so traumatic that only advanced yogis are able to do it without causing harm to themselves. But even they usually perform Sarvangasana better if they use support under their shoulders.
So what happens when a student bends their neck too much in a Shoulder Stand? At best, he risks getting a muscle strain. A more serious consequence is the stretching of the nuchal ligament, exceeding its elastic limit. It can be stretched gradually, over many sessions, until it loses the ability to recover to its normal state after traction. In this case, the neck loses its normal curve and remains flat not only after performing Sarvangasana, but throughout the day, always. With such a deformation, too much weight is transferred to the front side of the vertebrae and improper distribution of the load can provoke the growth of additional, compensating bone formations - painful “spurs”.
An even more serious consequence of excessive pressure on the neck is injury to the intervertebral discs. As the pose compresses the frontal part of the disc, one or more discs may slip backward or rupture, causing herniation and pinching of nearby spinal nerves, causing numbness, tingling, pain and weakness in the arms. Finally, a student with osteochondrosis who does the Shoulder Stand too hard may even cause cracks in the cervical spine.
Additional support for the shoulders Sarvangasane allows you to position your head below shoulder level, thereby reducing the degree of neck bending in the pose. Auxiliary materials increase the angle between the neck and torso, allowing you to achieve a vertical or almost vertical position in Shoulder Stand, while avoiding these problems. Despite all of the above, auxiliary materials cannot be called a panacea. Full version Sarvangasana Even with shoulder support, it may not be safe for students with too stiff necks or shoulders, those who have suffered a neck injury in the past, students with osteochondrosis, those who are overweight, etc. In these cases, it is better to perform various variations of the Shoulder Stand or replace it with simpler inverted poses, such as Viparita Karani (Bent Candle Pose).
One of the most effective modifications Sarvangasana– variation with a chair: in this case, the sacrum rests on the front edge of the seat, and the hips are located on the back of the chair. This option avoids unnecessary pressure on the neck area. ( Yoga Journal)
Strengthening the neck
 There is an elementary way to strengthen the neck muscles, which is also the only possible one in case of high instability of the position of the cervical vertebrae. This pathology is quite common in children, less often in adults, it is very painful and does not respond to exercise therapy methods. Traumatologists usually advise strengthening the neck muscles. The recommendation is sincere and is given, apparently, from the heart, but in this case it is contradicted by one small problem: in order to obtain the necessary muscle load, you need a movement that creates it. But with this pathology, any active movements of the head lead to further self-traumatization and a vicious circle results. But if we cannot move our head, then we have the opportunity to passively use its weight. In this case, the goal can be achieved only with the help of a static load, and this is done in the simplest way.
Lie on your stomach face down, resting your head on your hands. Lift your forehead from the support so that your head hangs in the air and move your arms slightly to the sides, with the tip of your nose almost touching the floor. And maintain this position until the moment when fatigue is felt in the neck muscles. Then you need to put your hands up and carefully lower your head on them. This is the first exercise. Second: lie on your back and slightly lift the back of your head from the floor, while your face looks straight up, and maintain this position until fatigue occurs in the front of your neck and throat muscles. The third position is to lie on your right side, raise your head parallel to the floor and remain there so that the muscles on the left side of your neck work. Then the fourth stage: lying on your left side, perform an action similar to the previous one. Repeat each position one to five times as the neck muscles adapt. Thus, with simple techniques it is possible to strengthen the neck muscles without any active movement of the head.
In many cases, with their help, it is possible to achieve complete stabilization of the vertebrae in children under thirteen years of age in two to three months. The same method is suitable for bringing the neck into a state that makes it possible to master inverted poses. ( V. Boyko, YIK)
Mastering Sarvangasan
 Your neck will remain safe and sound if you strictly follow two rules while performing Sarvangasana. Firstly, do not turn your head, and secondly, enter the pose extremely carefully. Several evenly folded blankets for support under the shoulders will help maintain natural cervical lordosis and avoid neck strains and other injuries.
So, take 3-4 blankets and fold them neatly. The finished shoulder support must meet three necessary conditions. Firstly, you need to choose a stand that is wide and long enough so that your shoulders and elbows can fit freely on it. Secondly, high enough to take the strain off your neck. And thirdly, it should be even and smooth so that there are no folds left on it, since your hands should be kept at the same level! When laying blankets one on top of the other, just try to perfectly align the edge of the support where your neck will be located.
Place the blankets about 60cm from the wall, with the stack edge facing the wall. Lie on your back so that your shoulders are on a stand 2-3 cm from the edge, and your head is on the floor. The distance between the blankets and the wall may vary. Try moving them closer and further from the wall to find the ideal distance for your height.
Bend your knees and extend your arms at your sides, palms up. Gently press the back of your head to the floor and your shoulders and arms to the blankets. This will help maintain the natural curve of your neck. Make sure that there is a gap between the neck and the floor - only now can you move on.
Inhale calmly and exhale, move your legs behind your head so that your toes are on the wall. Bend your elbows and place your palms on your lower back, fingers pointing up. The legs and torso should form an obtuse angle, as the shape of the pose is ideal for both beginners and more experienced students who experience discomfort in the neck during execution Sarvangasana. This version of the pose allows you to shift the weight of the pelvis onto your elbows - and relieve your shoulders and neck from unnecessary pressure.
Now focus on the base of the asana - elbows, shoulders and back of the head. The main load should be borne by the elbows, a little less by the shoulders, and only a small part of it should fall on the head. In the next two variations, the weight will be distributed slightly differently, but this position is safe for beginners.
If you are comfortable and do not feel discomfort in your neck, stay in the asana for 5–10 breathing cycles. If you feel tense, leave early.
Making a variation of "Birches"
 In the next variation, the body weight is increasingly transferred to the shoulders. While in the previous pose, rotate your upper arms from the inside out and move your shoulders away from your head. Feel how your neck lengthens thanks to these actions. Now expand and lift your chest until it reaches a vertical position. At the same time, move your palms closer to your shoulder blades.
Observe the sensations in your neck and throat. If you feel tension, relax your temples, eyes and lower jaw. Then lift your toes off the wall and bend your knees, pointing your feet toward your buttocks. Imagine that you want to reach your knees to the ceiling and intensively lengthen the front of your thighs. Gradually move your palms down your back to better lengthen your thoracic spine and open your chest.
Gently draw in your lower abdomen. Once your body is upright, return your focus to the base of the pose. Since the pelvis is now located not above the elbows, but above the upper parts of the arms, the shoulders are pressed closer to the support and the body weight will shift towards the head. Regardless, don't let your neck tighten. Distribute your body weight evenly between your elbows and shoulders and gently press the back of your head toward the floor to maintain the natural curve of your neck.
If you can hold this variation for 5–10 breath cycles, you are ready to perform the full variation. Sarvangasana.
We enter Sarvangasan
 To enter the full pose, straighten your legs and extend them up towards the ceiling. Continue lengthening the front of your thighs as in the previous variation. Gently pull your stomach in to lengthen even more - this will reduce the pressure on your shoulders. Observe your breathing - although it may require more effort in an inverted position, breathe evenly and calmly.
Actively stretch your legs and move your palms closer and closer to your shoulder blades. This will help open the chest, shoulders and collarbones. As you continue to develop the pose, observe your breath and sensations in your neck, eyes, ears, and tongue. If you feel tension in one of these areas, return to the previous variation.
Stay in full Sarvangasane for 5–10 breaths, then move your feet to the wall. Bend your knees and walk your feet down the wall until they are about 30cm from your head. Lift your palms from your back and carefully lower your pelvis to the floor, supporting yourself with your arms.
Rest for a few seconds in a lying position to avoid a sudden increase in intracranial pressure. Observe whether new sensations have arisen in the body and whether the internal state has changed in the inverted position. ( Yoga Journal)
The effect of practice Sarvangasana
Sarvangasana- one of the most useful of all asanas. If Sirsasana is the king, then Sarvangasana- the queen of all asanas. If Shirshasana develops masculine qualities - willpower, mental acuity and clarity of thinking, then Sarvangasana develops feminine qualities of patience and emotional stability. She is considered the mother of asanas. Just as a mother strives all her life for the happiness of her children, so this asana directs her efforts towards peace and health of the body. It would not be an exaggeration to call this pose “Trailokya Chintamani” - “an extraordinary pearl among the three worlds.”
Sarvangasana, as its name implies, has an effect throughout the entire system. Thanks to the inverted position, venous blood is transported without strain to the heart for purification, because gravity acts. Oxygen-enriched blood enters the chest area, bringing relief in cases of difficulty breathing, asthma, bronchitis, diseases of the throat and larynx, and palpitations. The pose is of great help in anemic conditions and in cases of reduced vitality. Thanks to the strong lock that forms the chin, the thyroid and parathyroid glands receive an abundant blood supply, thereby increasing their effectiveness in keeping the body and brain in good balance. Since the head is very stable due to the lock formed by the chin, the nerves are calmed, the brain is also calmed and headaches disappear. Common diseases such as colds and runny nose can be cured by the practice of this asana.
Sarvangasana It has a calming effect on the nervous system and is therefore good to practice when you are stressed, upset, irritated, tired, or suffering from nervous exhaustion or insomnia. Sarvangasana also helps regulate the processes of digestion and excretion, ridding the body of toxins; it helps get rid of constipation, cure intestinal ulcers, colitis and hemorrhoids. Sarvangasana has a corrective effect on disorders of the urinary system, displacement of the uterus and menstrual disorders. It gives calm, strength and vitality to the one who does it, and is recommended as the best restorative remedy after a long illness.
Physiology Sarvangasana
 The head of the Department of Traditional Health Systems, Candidate of Biological Sciences Rinad Sultanovich Minvaleev, recommends doing “a pose of all parts of the body” (sarvangasana) every evening as a beneficial effect on the heart muscle.
Actually, this is a “birch tree”. Unlike all other hatha yoga poses, everyone knows this one. And not by hearsay, but in practice. Birch tree (or candle) is the first gymnastic exercise, which to one degree or another is feasible for any schoolchild. But to influence the heart, you need to do sarvangasana not for 5 seconds, but for 2-3 minutes. This position of the body increases blood flow through the vertebral artery to the occipital region, which stimulates the functioning of all centers of visceral regulation of the brain stem structures, improves the functioning of all organs and functional systems of the body, hence the name - “posture of all parts of the body.”
Sarvangasana serves as an effective prevention of varicose veins, has a beneficial effect on cerebrovascular accidents. But the main thing is that “birch” improves the performance of the left ventricle of the heart muscle. According to Rinad Minvaleev, this asana effectively replaces aerobic exercise, and therefore strengthens the heart. However, according to the scientist, this is not even the main purpose of the “birch tree”.
If you look at the “children’s birch tree”, and then at the “correct sarvangasana”, a significant difference is visible: yoga performance involves the so-called chin lock (clamp in the thyroid gland). That is, "posture of all parts of the body" has a powerful effect on this area; and in the early stages of thyroid diseases, it works as a medicine. (However, if the thyroid gland is normal, then a “chin lock” is not necessary to affect the heart.)
 This asana will be especially effective during the full moon and on the waning moon - as it “drives blood” towards the head. To perform the pose accurately, it would be appropriate to ask someone to check the strictly vertical position of the thoracic spine. Only then will you get a full-fledged “chin lock”. Otherwise, there will be no effect on the thyroid gland.
In order for the treatment to be complete, immediately after the “birch tree” it is very useful to do Matsiasana - fish pose. This tandem not only treats developing myxedema and thyrotoxicosis, but also precedes the use of hormonal drugs prescribed during the development of myxedema, such as thyroxine.
It seems incredible, but with just one simple exercise you can get rid of wrinkles and gray hair, and generally become younger. We know it under the name “birch tree”.
RULES FOR COMPLETING THE EXERCISE
You can do the exercise every day in the morning. You should not have breakfast before this, but you can drink a glass of juice. Besides, this exercise is incompatible with alcohol consumption - the effect of such practice can only be negative. For the same reason as alcohol, it is advisable to remove all unhealthy heavy foods, in particular meat, from the diet. Women should not perform this exercise during pregnancy or menstruation. Those who have high blood pressure also need to be careful.
While doing the exercise, relax and close your eyes. If you are unable to relax in this pose, then you are doing something wrong. Perform the exercise only until discomfort appears and after some time you will notice that you can stay in this position longer without discomfort
It is important that if you perform the “birch” pose, be sure to do the opposite pose – the “snake”.
To do this, you need to lie on your stomach and rise with your arms wide apart, as if doing push-ups, but arch your upper back, with your pelvis on the floor. To avoid health problems, make sure that the time spent in the “birch tree” is necessarily equal to the time spent in the “snake” pose.

Regarding the length of stay in the inverted position to achieve the desired effect, different sources differ here. Some sources claim that you need to stay in this position for at least 30 minutes, while others say that 8 minutes a day is enough.
But all sources agree on one thing: you need to start with 1-2 minutes, gradually increasing the duration of the exercise (you can add 30 seconds daily).
WHAT THEY SAY MODERN RESEARCH
Modern medicine has discovered many advantages in this exercise. According to doctors, the inverted position of the body removes part of the load from the circulatory system and creates the need to overcome the force of gravity as blood passes through the lower part of the body.
Blood rushes to the organs of the abdomen and upper body, especially the neck and head. The blood vessels of the legs rest, the brain receives additional blood supply, and the thyroid gland is abundantly washed with fresh blood.
In addition, this exercise eliminates constipation, poor digestion, anemia, increases appetite and overall vitality of the body, helps neutralize and destroy toxins.
Similar articles
 Sports career and best fights of Conor McGregor
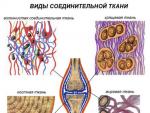 Structure and functions of nervous and muscle tissues
 Briefly about Pioneerball: rules of the game and secrets of victory
 Topic “Sports in my life”
 David Yurchenko: my mother sometimes criticizes my actions on the field
 Training of painful holds (bending the arm behind the back, levering the arm outward)
 Simple and effective self-defense techniques on the street
 Notable Historical Moments
 The International Olympic Committee was created at the Olympics
 History of the Winter Olympics